Mixing Guide.
Below is a guide that can help as a starting point. Whilst the screenshots in this guide are based on Ableton Live, the same concepts can be applied to any DAW.
In this instance, we are mixing with the Dry Lead, Doubles & Harmony layers. Each layer is placed within its own audio track, with all 3 audio tracks routed to a group (Vocal Bus) track.
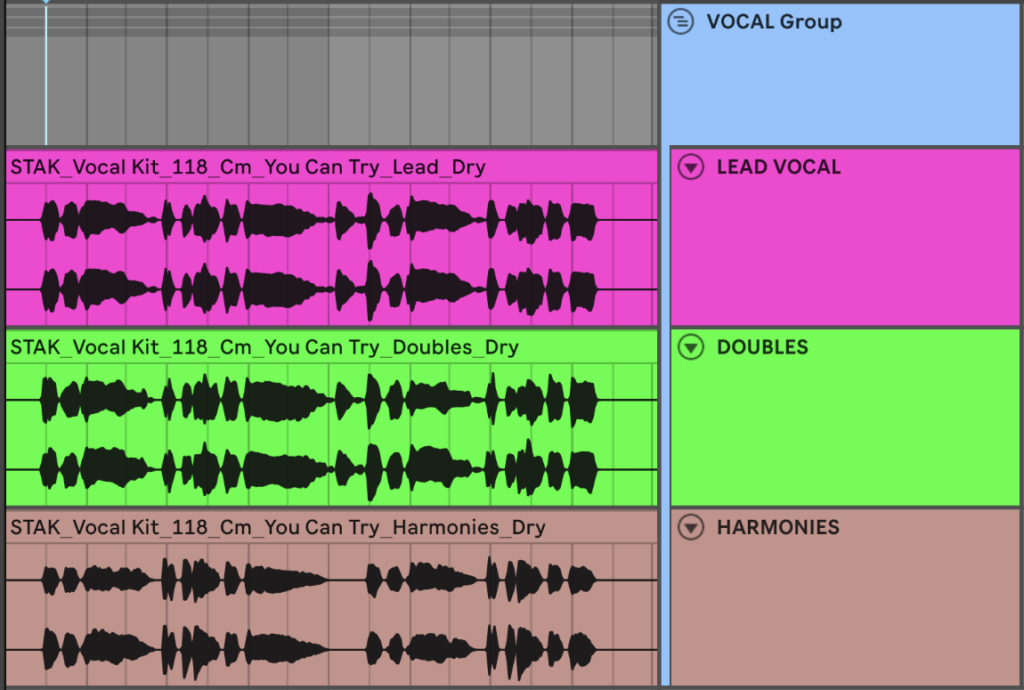
Lead Vocal: This is the main focus of the vocal mix; any other layers are mixed around it. Give the lead vocal plenty of headroom; try setting its level between -6 to -12 dB.
Doubles: These help to thicken the Lead Vocal and can add a sense of width. Our Doubles consist of 2 extra vocal layers, the width has been created by panning each layer left or right.
Bring the Doubles up in level until the required effect is achieved. Our Doubles will sound quite natural around 6-7dB lower than the Lead. There are no rules here, so think of this as a good starting point. Higher Doubles levels will give the effect of more width, so play with the Lead & Doubles balance. If a more mono sound is required, try reducing the left & right pan amounts.
Stak: If you can’t decide on the mix balance for the Lead and Doubles, we also supply a Stak layer. This is our mix of the Lead and Doubles together (dry or wet).
Harmonies: Add additional voices (notes) simultaneously to the vocal melody. In general, vocal harmonies may be sung by the lead vocalist over multiple takes or by backing vocalists live. The harmony will fit an underlying chord structure. They can transform a Vocal Kit. Bring the harmonies up in level until the required effect is achieved.
The harmonies can also be used on their own as a completely different vocal section, whether it be as a different Lead Vocal, or for unique vocal chops
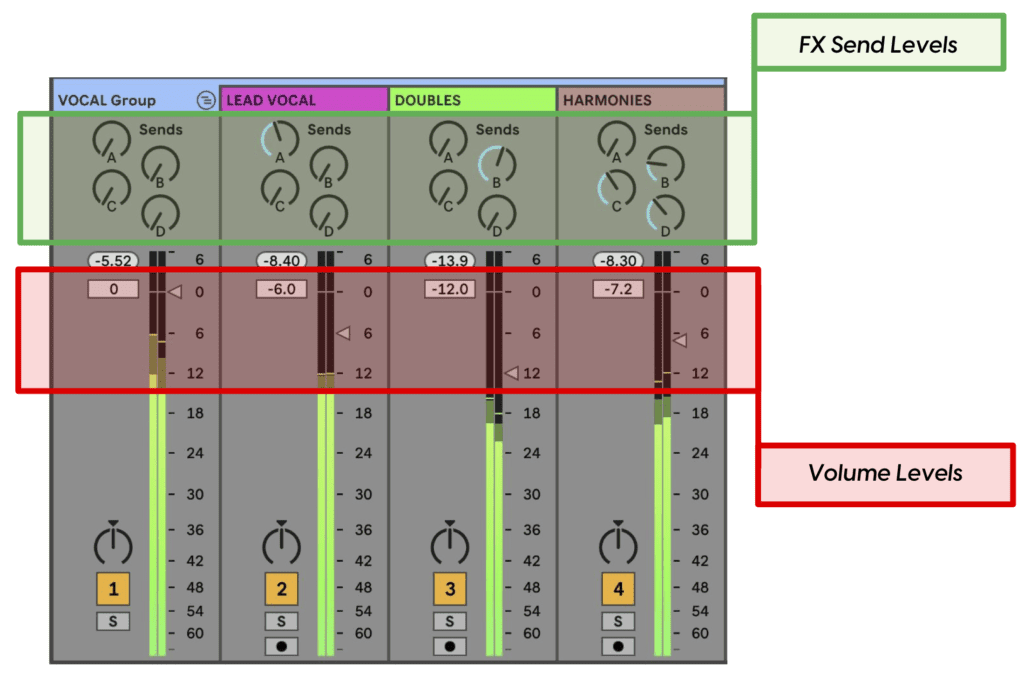
Panning: Although we’ve taken care of panning during our mixing stage within the Double & Harmony layers, pan any layer wherever the hell you like!
EQ & Compression: The beauty of multiple layers is that you can treat each one exactly how you want them. All of our layers have been EQ’d and compressed, but that doesn’t mean you can’t radically alter the tone and dynamics to suit your needs.
For many producers, subtle Vocal Group (Bus) compression may be all you need. Below are some settings that you may find useful. Notice that the attack and release aren’t set too fast, to allow the vocals to move naturally.

And to anyone interested, our favourite EQ tools include:
- Fabfilter Pro-Q 3: an excellent all-rounder
- HVA EQ-6S Hardware EQ: mainly for adding air with its high frequency shelf
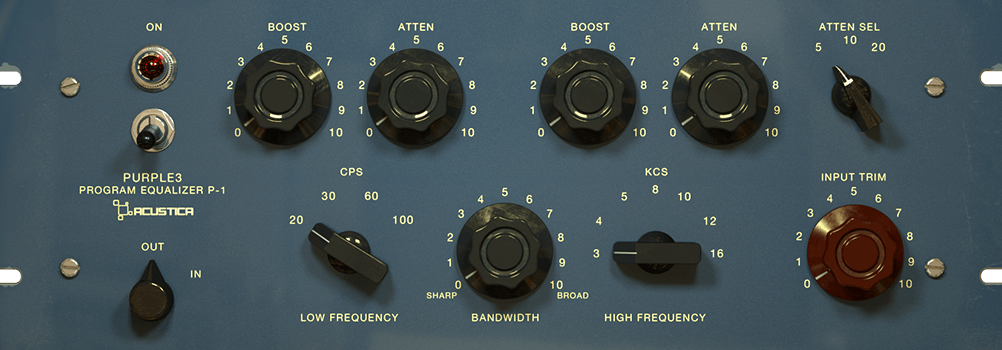
- Acustica Purple: Pultec emulation for some extra vibe!
And compression:
- Drawmer DL251 Hardware: used mainly for its ‘enhance’ function
- Vertigo VSC-2: an absolute favourite
- SSL Native Bus Compressor: nice on a complex vocal group (bus).
- Reverb & Delay: It’s now time to add the ambience effects such as reverb & delay. This is best done with a send/return setup.
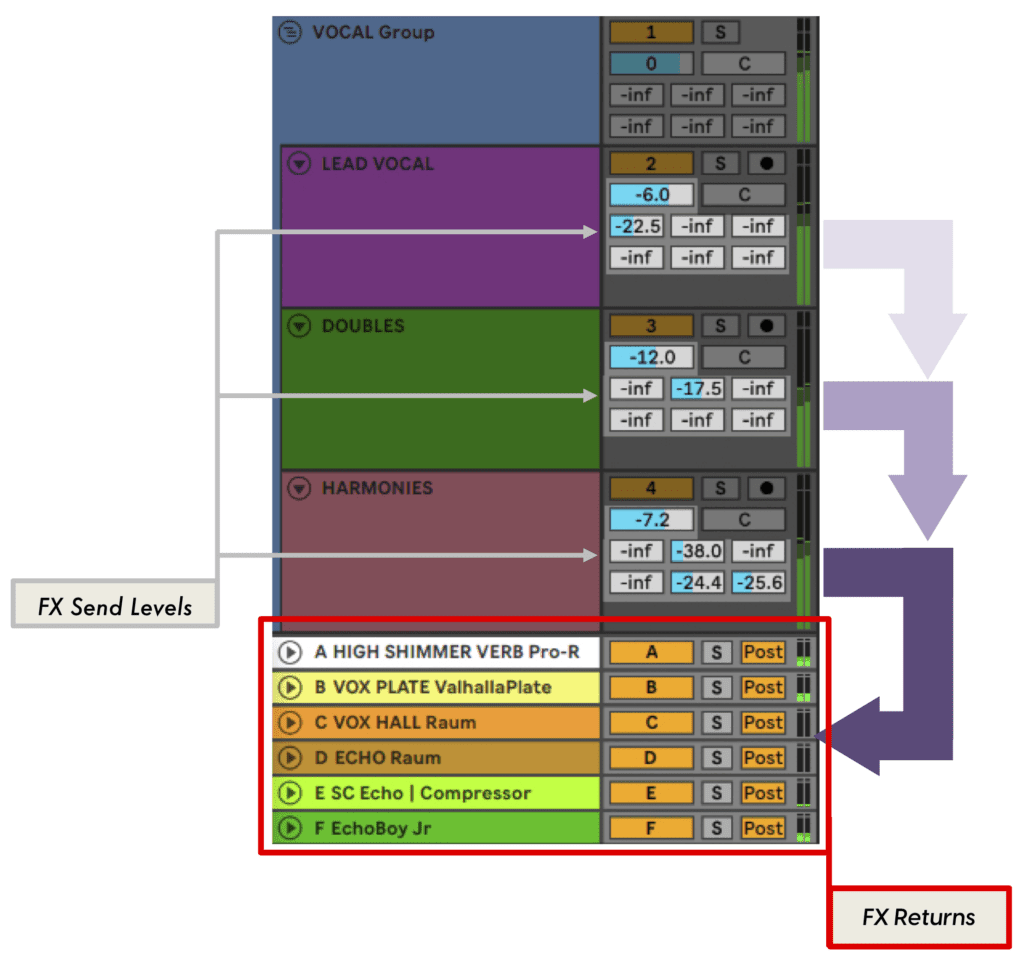
For our own mixing process, our Wet layers will include a combination of reverbs and delays.
Try starting with a plate style, bright reverb.
Our favourite Reverb & Delay tools include:
- Fabfilter Pro-R: very pleasing on vocals
- U-he Satin: gorgeous sounding tape delay emulation
- Ableton Echo & Hybrid Reverb
- Valhalla Plate & Vintage Verb: for real atmospheric vibes.
- Ensoniq DP/4 Hardware: for anything needing something grainy and digital
- Native Instruments RC24: Lexicon 224 emulation
Other processing and corrective tools we often use and recommend include:
- Louder Than Liftoff – Silver Bullet Hardware
- Oeksound – Soothe 2
- Celemony – Melodyne
- iZotope – RX8
- Tokyo Dawn Labs – Nova
- Soundtoys
Audio specifications. High resolution 24bit 44.1khz WAV files
©STAK 2023